TM 5-3805-255-14
0038
REMOVAL
1. Remove fan in accordance with Testing, step 1, in this work package.
2. Use two 3/8 x 3-3/8 in. UNC grade 8 bolts and nuts to install prefabricated torque adapter (WP 0125) on fan
mounting assembly.
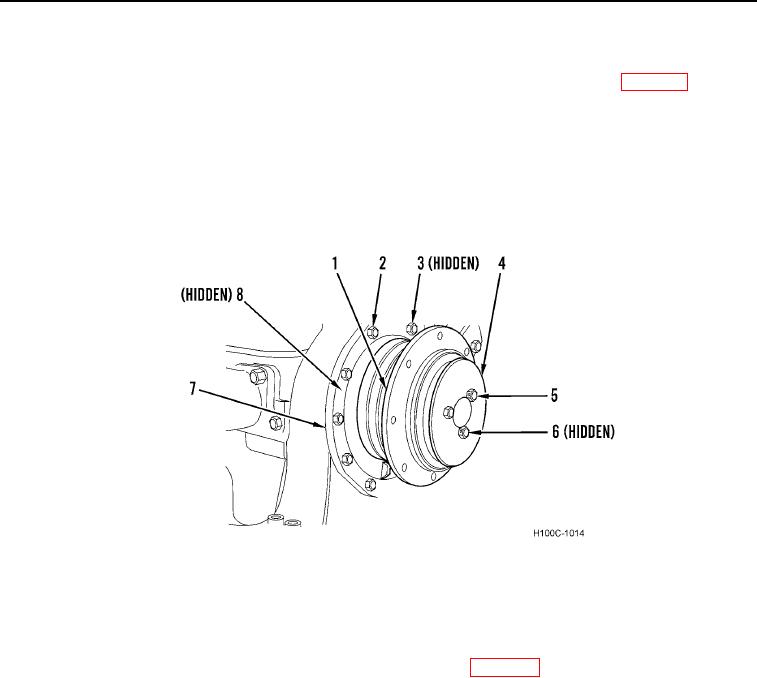
3. Remove three bolts (Figure 1, Item 5), washer key locks (Figure 1, Item 6), and hub retainer plate (Figure 1,
Item 4) from fan drive assembly (Figure 1, Item 1). Discard washer key locks.
4. Remove ten bolts (Figure 1, Item 2), washers (Figure 1, Item 3), and fan drive assembly (Figure 1, Item 1) from
front cover (Figure 1, Item 7).
5. Remove gasket (Figure 1, Item 8) from front cover (Figure 1, Item 7). Discard gasket.
Figure 1. Fan Drive Assembly Removal.
0038
END OF TASK
CLEANING AND INSPECTION
00038
1. Clean and inspect all parts IAW General Maintenance Instructions (WP 0019).
2. Check fan blades for looseness and bends; replace if necessary.
END OF TASK
0038-2

