TM 5-3805-262-20
REMOVAL (SHEET 2 OF 2)
(3)
(4)
( 5)
(6)
(7)
( 8 )
(9)
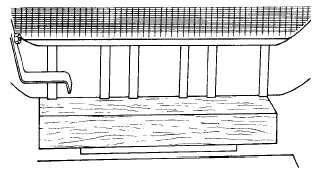
Place a wooden block under radiator (7) as shown below.
Remove eight capscrews (2), nuts (3), lock washers (4), and washers (5
and 6).
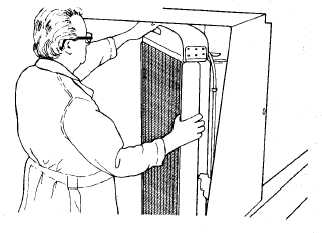
Remove radiator (7) as shown.
Remove radiator by working one
s i d e o f i t p a s t s t o p a n d t a i l
light mounting bracket welded
to guard (26).
Remove two capscrews (8), nuts
(9), lock washers (10), and
washers (11).
Remove two capscrews (12), nuts
(13), lock washers (14), and
washers (15). Remove two
b r a c k e t s ( 1 6 ).
Remove eight capscrews (17), nuts (18), lock washers (19), and
(20). Remove
Attach a 1/4
s l a c k .
RH bracket (21) and LH bracket (22).
washers
ton chain hoist securely to guard (26) and take up all
Remove four capscrews (23), nuts (24), and lock washers (25).
B e f o r e p e r f o r m i n g f o l l o w i n g s t e p , c h e c k a n d e n s u r e t h a t w i r i n g,
harnesses, cable clamps, etc, have been removed and are not secured to
guard (26) and that these items will not interfere with guard removal.
Failure to do so could cause serious injury and/or damage to equipment.
When using chain hoist to remove or install parts, be sure chain hoist
i s s e c u r e l y f a s t e n e d t o p a r t a n d t h a t a l l s l a c k i n c h a i n i s t a k e n u p .
Failure to do so could cause serious injury due to part falling on you.
If you are injured by falling equipment, obtain medical aid immediately.
(10) Using chain hoist, remove guard (26) from loader.
4-81


