TM 5-2420-231-23-3
0331
INSTALLATION CONTINUED
NOTE
Latch rod must be adjusted prior to interior panel installation.
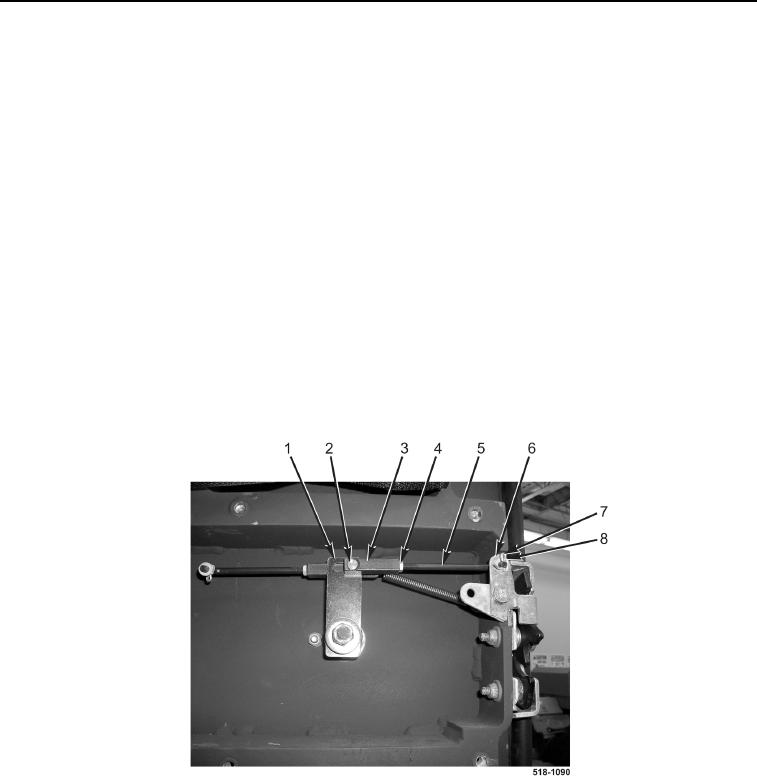
20. Latch rod (Figure 16, Item 5) is adjusted by loosening jamnut (Figure 16, Item 4) and turning latch rod in latch
rod base (Figure 16, Item 3).
21. Latch rod screw (Figure 16, Item 2) should be positioned to right-side of door lever slot (Figure 16, Item 1) with-
out placing tension on latch lever (Figure 16, Item 6).
22. To adjust screw position:
a. Loosen jamnut (Figure 16, Item 4).
b. Remove cotter pin (Figure 16, Item 7) and washer (Figure 16, Item 8). Discard cotter pin.
c.
Remove latch rod (Figure 16, Item 5) from latch lever (Figure 16, Item 6).
d. Turn latch rod (Figure 16, Item 5) in latch rod base (Figure 16, Item 3) to properly position screw
(Figure 16, Item 2) in door lever slot (Figure 16, Item 1).
e. Install latch rod (Figure 16, Item 5) on latch lever (Figure 16, Item 6).
f.
Install washer (Figure 16, Item 8) and new cotter pin (Figure 16, Item 7) on latch rod (Figure 16, Item 5).
g. Tighten jamnut (Figure 16, Item 4).
Figure 16. Exterior Latch Rod Position.
0331

