TM 5-3805-255-14
0041
REMOVAL
00041
NOTE
Tag all wires and cables prior to removal for ease of installation.
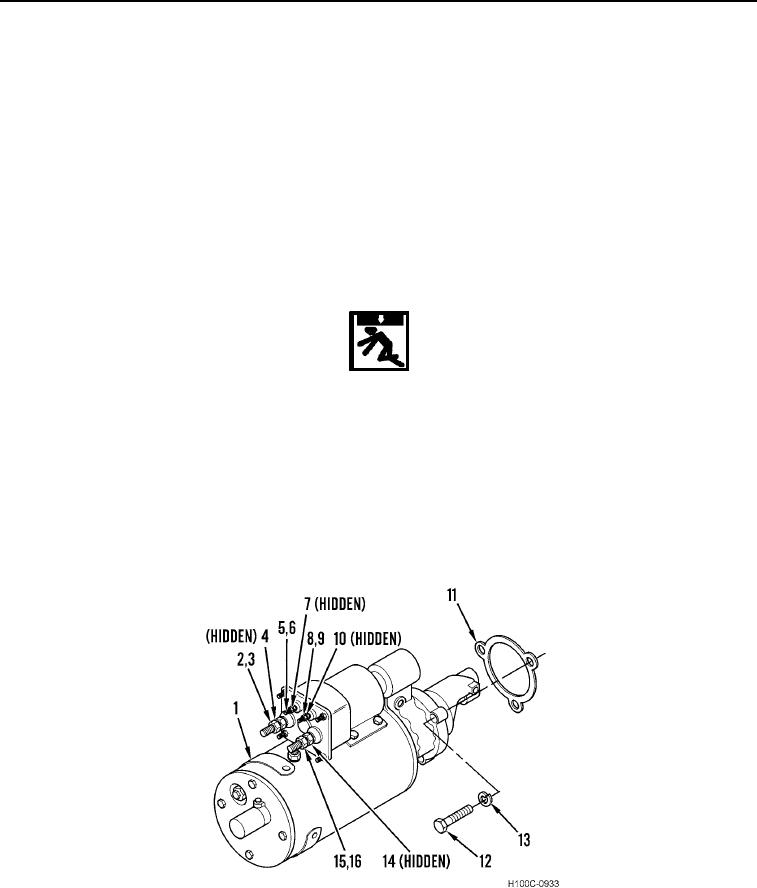
1. Remove nut (Figure 1, Item 2), lockwasher (Figure 1, Item 3), and two cables (Figure 1, Item 4) from starter
(Figure 1, Item 1). Discard lockwasher.
2. Remove nut (Figure 1, Item 15), lockwasher (Figure 1, Item 16), and cable (Figure 1, Item 14) from starter
(Figure 1, Item 1). Discard lockwasher.
3. Remove nut (Figure 1, Item 5), lockwasher (Figure 1, Item 6), and two wires (Figure 1, Item 7) from starter
(Figure 1, Item 1). Discard lockwasher.
4. Remove nut (Figure 1, Item 8), lockwasher (Figure 1, Item 9), and wire (Figure 1, Item 10) from starter (Figure
1, Item 1). Discard lockwasher.
WARNING
Use extreme caution when lifting heavy parts. Provide adequate support and use
assistance during procedure. Ensure lifting equipment used is on solid footing, is in good
condition, and has suitable lifting capacity. Keep clear of heavy parts supported only by
lifting equipment.
Failure to follow this warning may result in injury or death to personnel or damage to
equipment.
5. Remove three bolts (Figure 1, Item 12), lockwashers (Figure 1, Item 13), and starter (Figure 1, Item 1) from
engine. Discard lockwashers.
6. Remove gasket (Figure 1, Item 11) from starter (Figure 1, Item 1). Discard gasket.
Figure 1. Starter Removal and Installation.
0041
END OF TASK
0041-2

