TM 5-3805-255-14
0086
REMOVAL CONTINUED
2. Place boom and bucket control lever in neutral (HOLD) position.
3. Using a suitable support device, securely block rear of bucket to prevent it from rolling back when bucket is
separated from linkage assembly.
WARNING
Ensure bucket is attached to suitable lifting device to provide support during bucket
removal. Be sure chain hoist is securely fastened to part and that all slack in chain is taken
up. Failure to do so could cause serious injury due to part falling on you. Failure to follow
these instructions may result in death or injury to personnel.
4. Attach suitable lifting device to bucket to support during removal.
CAUTION
Support bucket links during pin removal. After removing pins, carefully lower links to
ground. Failure to follow these instructions may result in damage to equipment.
NOTE
After bucket removal, to prevent loss of parts, reinstall four pins in their respective bucket
bores, looping cord rings over pins as they are installed. Thread two locking capscrews
with two lockwashers and flat washers through pinlock and into respective bores. Coat all
pin shanks with grease (WP 0018) to prevent rusting.
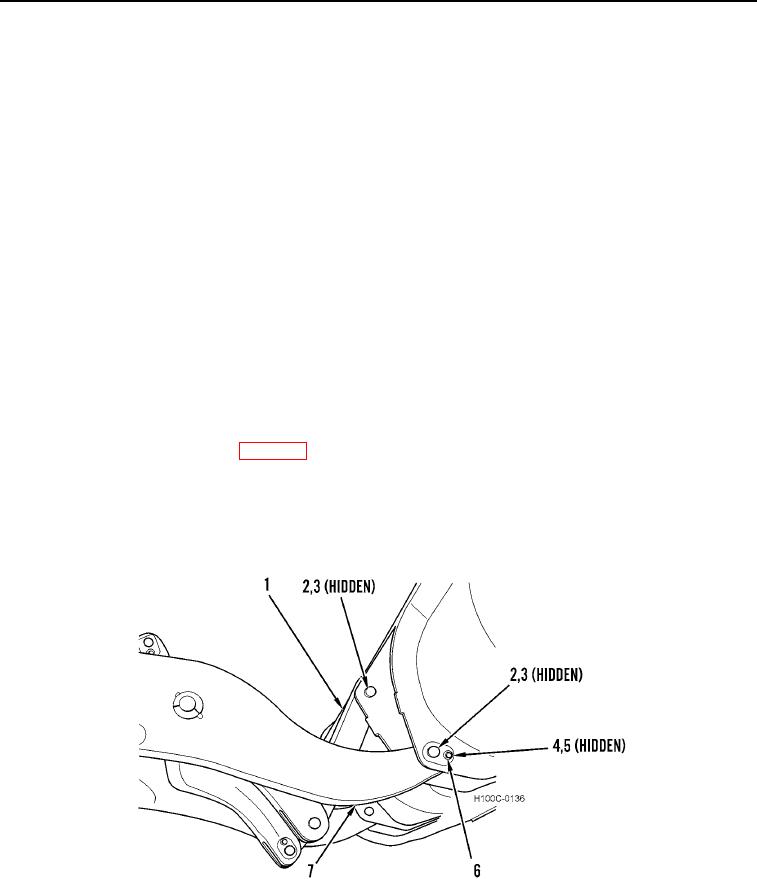
5. Remove two pin-locking capscrews (Figure 2, Item 4), lockwashers (Figure 2, Item 5), and flat washers (Figure
2, Item 6). Remove four pins (Figure 2, Item 2) and cord rings (Figure 2, Item 3) from bucket (Figure 2, Item 1).
6. Place boom and bucket control lever in FLOAT position, allowing boom arms (Figure 2, Item 7) to drop away
from bucket (Figure 2, Item 1).
Figure 2. Typical Bucket Removal.
0086
0086-2

