tors carefully depress reflectors and fasten in place
with retaining screws.
Service Batteries: Keep terminals clean and
tight, and be sure distilled water is added to cover
plates and separators in each cell. Do not overfill.
To prevent serious damage to electrical system
components when recharging or replacing batteries
in the "Delcotron" charging system.
. . . REMEMBER . . .
1. When installing batteries, make sure batteries
and "Delcotron" polarities are the same.
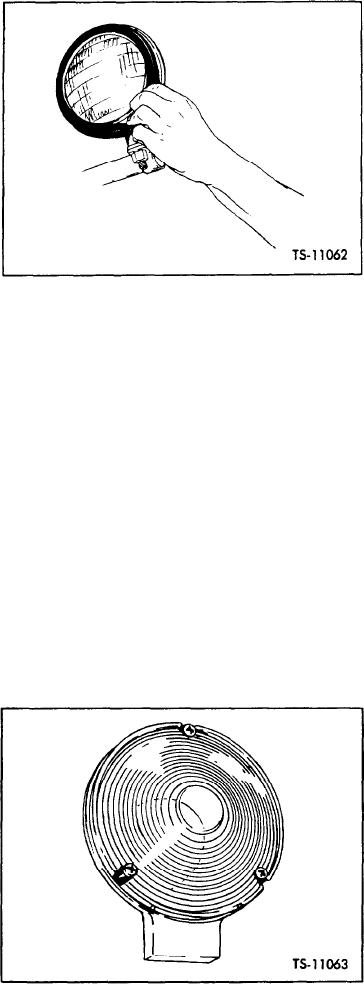
Fig. 14.
Replace Headlamps or Back-Up Lamps
2. Booster batteries must be paralled.
The headlamps and back-up lamps are floodlamps
that disperse light in a horizontal pattern.
3. Battery-charger and battery polarities must
agree.
H e a d l a m p s are factory adjusted, but may be
re-adjusted at the headlamp mounting bolts or nuts
4. Before doing any welding, disconnect ground
to obtain a desired light pattern.
c a b l e from batteries and electrical lead from
battery terminal on alternator.
If necessary to replace floodlamps, depress lamp
Tighten Wheel Nuts and Inspect Rims: Wheel
and spread lip of rubber retainer outward forcing
nuts should be checked regularly and kept tight.
lamp out as shown in Figure 14, and disconnect
Loose wheel nuts will cause undue tire wear, strain
terminals. Reconnect terminals on new lamp and
axle assemblies and affect steering and load distri-
reinstall in retainer.
bution. Apply lubricant on threads of wheel studs
only and tighten wheel nuts to torque specified on
(b) Dash, Tail and Stop Lamps: These lights
B o l t Torque Chart.
are easily replaced by a push and a twist. To re-
move dash lamp reflector from dash lamp assembly
C h e c k rims for bent or damaged flanges and
pull out to remove and push on to retain. Reflec-
repair or replace as needed.
tors for the tail and stop lights must be removed
by removing three screws shown in Figure 15 and
Check Air Chambers and Lines for Leaks:
carefully forcing reflectors out, To reinstall reflec-
Periodically check connecting lines and fittings to
be sure they are air tight. Air chambers occasion-
ally should be painted with soap solution to detect
l e a k a g e . Tighten clamping ring bolts uniformly
until leakage is eliminated, as no leakage is per-
missible.
Check and securely tighten air chamber to
m o u n t i n g bracket bolts and mounting bracket to
axle bolts.
Clean Cylinder Rods: Wipe boom, bucket, and
steering cylinder rods with clean cloth saturated
i n hydraulic oil. Check rods for nicks or burrs
w h i c h would damage packings or seals. Remove
such nicks or burrs with a fine grained hand stone
or crocus cloth.
Fig. 15. Remove Reflectors and Replace Tail or Stop lamps
[45-02-3]

