
TM 5-3805-298-23-4
0397
LEFT BATTERY BOX AND NATO SLAVE REMOVAL CONTINUED
WARNING
To avoid injury, eye protection and acid-resistant gloves must be worn when working
around batteries. DO NOT smoke, use open flame, make sparks, or create other ignition
sources around batteries. If a battery is giving off gases, it can explode and cause injury to
personnel. Remove all jewelry such as rings, ID tags, watches, and bracelets. If jewelry or
a tool contacts a battery terminal, a direct short will result in instant heating or electric
shock, damage to equipment, and injury to personnel.
Sulfuric acid contained in batteries can cause serious burns. If battery corrosion or
electrolyte makes contact with skin, eyes, or clothing, take immediate action to stop the
corrosive burning effects. Failure to follow these procedures may result in death or injury
to personnel.
NOTE
Tag and mark electrical connectors and note cable routing to aid installation.
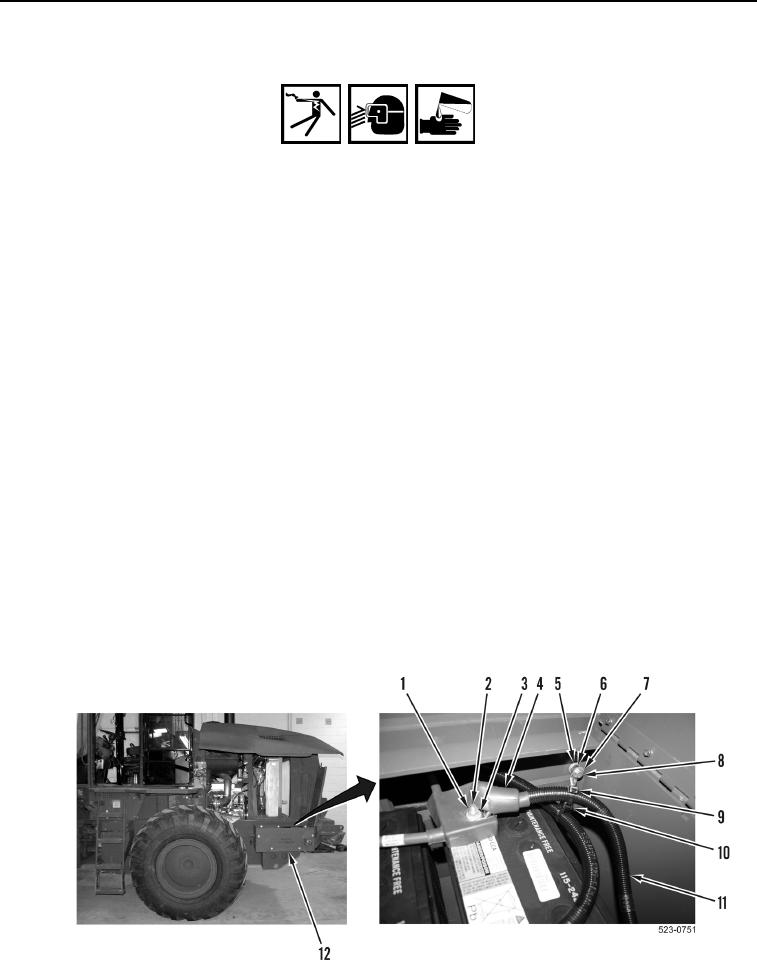
3. Position positive cable boot (Figure 8, Item 4) aside.
4. Remove nut (Figure 8, Item 1), washer (Figure 8, Item 3), and positive NATO slave cable (Figure 8, Item 11)
from stud (Figure 8, Item 2).
5. Remove tiedown strap (Figure 8, Item 9) from saddle (Figure 8, Item 10) and positive NATO slave cable
(Figure 8, Item 11). Position positive NATO slave cable aside. Discard tiedown strap.
NOTE
Note position of washers spacers and cable to aid installation.
6. Remove bolt (Figure 8, Item 7), two washers (Figure 8, Item 5), spacer (Figure 8, Item 6) and ground NATO
slave cable (Figure 8, Item 8) from battery box (Figure 8, Item 12).
Figure 8. NATO Slave Cables.
0397