TM 5-2420-231-23-3
0370
WEATHERPROOF CONNECTOR REPAIR CONTINUED
NOTE
Perform steps 6 and 7 only if terminal was removed.
Install terminals as noted during removal.
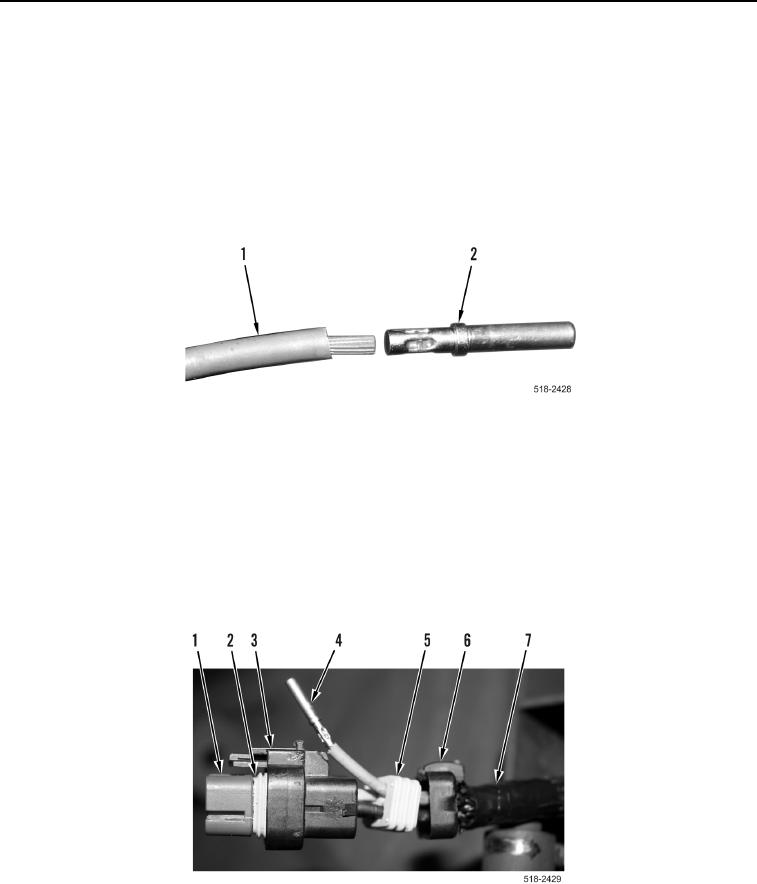
6. Using wire stripping tool, strip insulation from wire (Figure 15, Item 1) equal to depth of terminal
(Figure 15, Item 2).
7. Using crimping tool, securely crimp terminal (Figure 15, Item 2) on wire (Figure 15, Item 1).
Figure 15. Female Terminal.
0370
8. If removed, install sleeve (Figure 16, Item 6) and seal (Figure 16, Item 5) on wiring harness (Figure 16, Item 7).
9. Insert terminal (Figure 16, Item 4) into connector body (Figure 16, Item 3). Pull wire to ensure terminal is locked
in place on connector body.
10. Slide seal (Figure 16, Item 5) into connector body (Figure 16, Item 3).
11. Slide shell (Figure 16, Item 6) up wiring harness (Figure 16, Item 7) and onto connector body
(Figure 16, Item 3).
12. Install seal (Figure 16, Item 2) and terminal lock (Figure 16, Item 1) on connector body (Figure 16, Item 3).
Figure 16. Weatherproof ConnectorFemale.
0370

