TM 5-3805-262-20
INSTALLATION (SHEET 2 OF 2)
(j) Position air cleaner assembly (5) on engine hood while connecting air
cleaner outlet to reducer (7). Secure air cleaner assembly (5) using
four capscrews (2), lock washers (3), and washers (4). Tighten capscrews
( 2 ) s e c u r e l y .
(k) Tighten hose clamp (1).
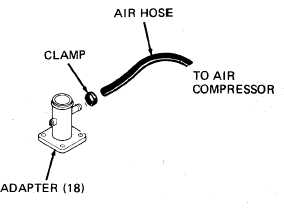
(l) Position clamp on air hose. Connect
air hose to adapter (18) by firmly
pushing air hose on to adapter (18)
fitting. Position and tighten clamp
s e c u r e l y .
(m) Reinstall engine top hood (page 9-13).
TESTING
Adapter (14) installed in adapter (18) prevents dirt from entering engine if re-
striction indicator (22) or tube (13) is damaged . Continued operation if these parts
are damaged will cause adapter (14) to be clogged with dirt. When this happens, re-
s t r i c t i o n i n d i c a t o r ( 2 2 ) w i l l n o t o p e r a t e . F o l l o w i n g t e s t w i l l e n s u r e t h a t a d a p t er
( 1 4 ) i s n o t c l o g g e d w i t h d i r t .
.
(a)
On right instrument panel, pull fuel shutoff
control out until it stops moving.
(b)
( c)
(d)
( e)
( f )
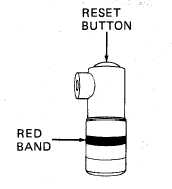
Ensure that restriction indicator red band is
out of view. If necessary, press button on top
o f i n d i c a t o r .
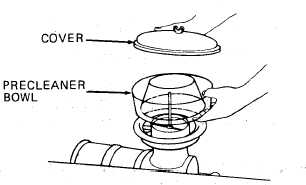
Remove precleaned bowl from air cleaner assembly.
Hold a piece of cloth over air cleaner assembly air intake while an as-
sistant holds key switch in START position for 15 seconds.
Check that restriction indicator red band is in view. If red band is not
in view, adapter (14) is clogged with dirt and shall be replaced .
Reinstall precleaned bowl.
4-31


