TM 5-3805-262-34
(6)
(7)
(8)
(9)
( l o )
(11)
(12)
DISASSEMBLY ( SHEET 2 OF 3)
(2) Put control valve assembly on clean work bench.
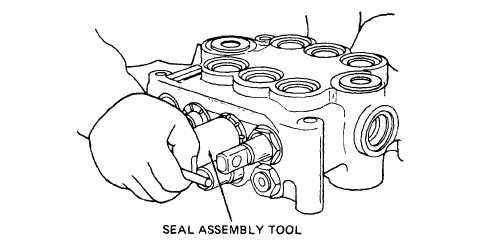
(3) Using seal assembly tool, loosen and remove seal assembly (1) as shown.
( 4)
Remove retainer (2) and O-ring (3) from seal assembly (l). Discard
O-ring.
(S) Remove washer (4) and O-ring (5). Discard O-ring.
Don-t overtighten vice in following step. TO do so will cause damage to
control valve body.
Put control valve assembly in a soft jawed vise.
Remove four screws (6).
Pull connector (8) up from cap (11) just enough to gain access to wires
soldered to its contacts. Tag and unsolder wires from connector contacts.
Remove connector.
Remove setscrew (9).
Using screwdriver,
Remove O-ring (12)
Remove spacer (13)
remove retaining ring (10). Then remove cap (11).
from cap (11). Discard O-ring.
and spacer (14) from detent housing (20).
3-673

