TM 5-3805-290-23-2
GEAR MOTOR HYDRAULIC FAN REPLACEMENT - CONTINUED
0187 00
REMOVAL - CONTINUED
11.
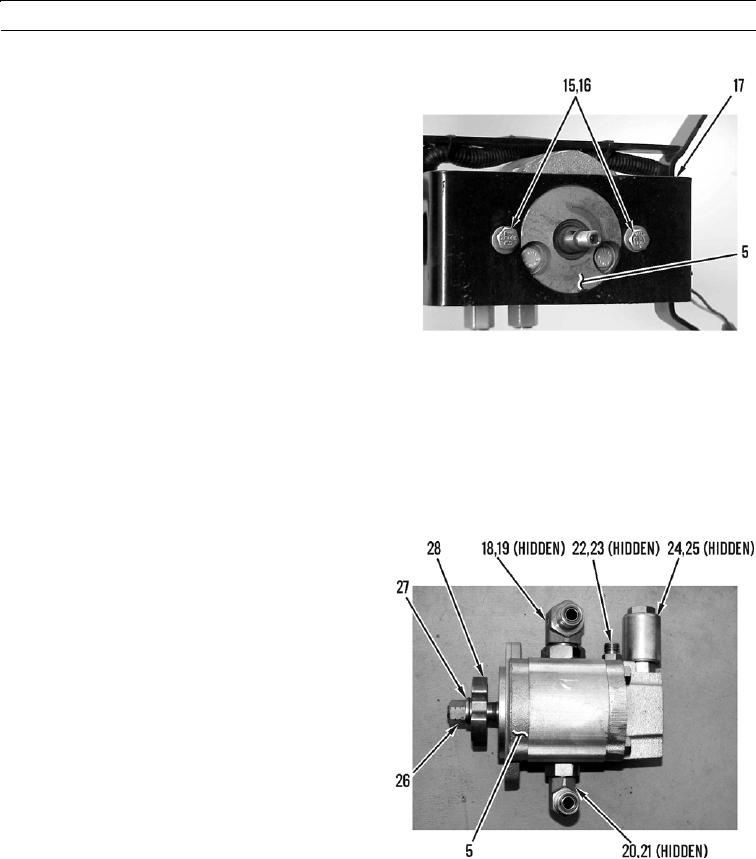
Remove two bolts (15) and washers (16) from fan
motor bracket (17).
12.
Remove fan motor (5) from fan motor bracket (17).
427-B0767
COMPONENT TRANSFER
1.
Remove elbow (18) and O-ring (19) from fan motor (5). Discard O-ring.
2.
Remove elbow (20) and O-ring (21) from fan motor (5). Discard O-ring.
3.
Remove connector (22) and O-ring (23) from fan motor (5). Discard O-ring.
4.
Remove demand fan solenoid (24) and O-ring (25) from fan motor (5). Discard O-ring.
5.
Remove nut (26), washer (27), and hub (28) from fan motor (5).
N OT E
Apply a thin coat of clean oil to all
O-rings prior to installation.
6.
Install hub (28), washer (27), and nut (26) on fan
motor (5).
7.
Install new O-ring (25) and demand fan solenoid (24)
on fan motor (5).
8.
Install new O-ring (23) and connector (22) on fan
motor (5).
9.
Install new O-ring (21) and elbow (20) on fan motor
(5).
10.
Install new O-ring (19) and elbow (18) on fan motor
(5).
427-B2006
0187 00-5

