TM 5-3805-291-23-2
REFRIGERANT ACCUMULATOR REPLACEMENT - CONTINUED
0225 00
REMOVAL - CONTINUED
2.
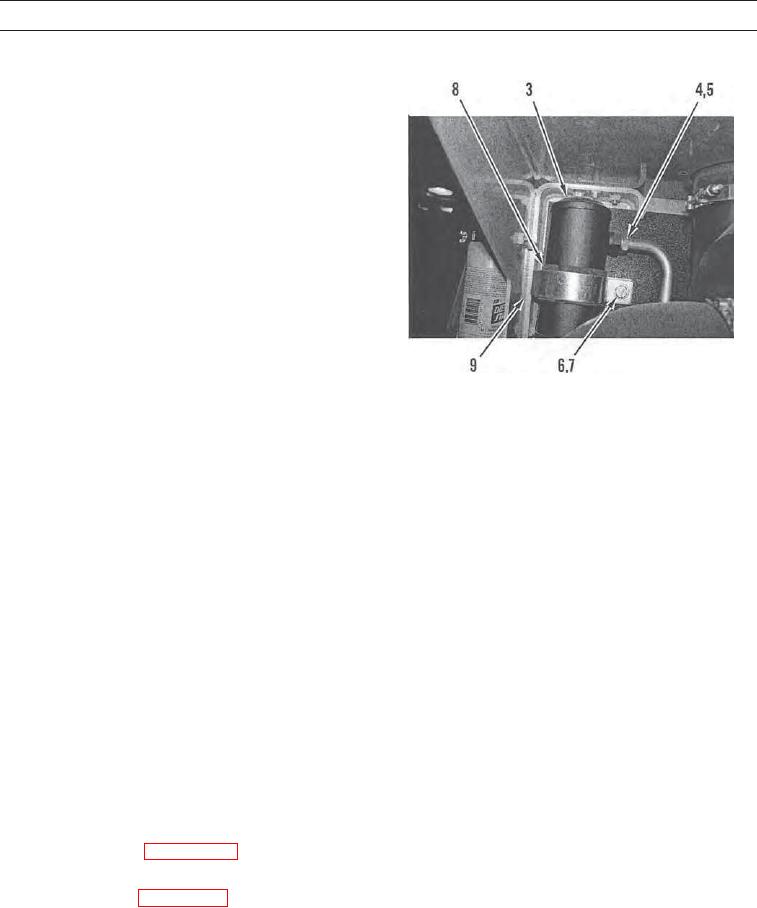
Disconnect tube (4) and remove O-ring (5) from
refrigerant accumulator (3). Discard O-ring.
3.
Remove bolt (6) and washer (7) from mounting
bracket (8).
4.
Remove mounting bracket (8) and refrigerant accumu-
lator (3) from hydraulic tank (9).
5.
Drain and measure old oil from refrigerant accumula-
tor (3).
427-C1188
INSTALLATION
N OT E
Do not add oil if compressor was also changed.
1.
Fill new refrigerant accumulator (3) with amount of new oil equal to that drained from old refrigerant accumulator.
2.
Position refrigerant accumulator (3) and mounting bracket (8) on hydraulic tank (9).
3.
Install washer (7) and bolt (6) on mounting bracket (8).
N OT E
Apply a thin coat of clean refrigerant oil to all O-rings prior to installation.
4.
Install new O-ring (5) in tube (4) and connect tube to refrigerant accumulator (3).
5.
Install new O-ring (2) in tube (1) and connect tube to refrigerant accumulator (3).
WAR N I N G
Before operating the machine, secure the steering frame lock in the stowed position. DO NOT operate
machine with steering frame lock connected. Failure to lock steering frame lock into the stowed position
before operating can result in loss of steering and injury or death to personnel.
6.
Secure steering frame lock in stowed position (TM 5-3805-291-10).
7.
Run engine until normal temperature is reached (TM 5-3805-291-10).
8.
Shut down engine (TM 5-3805-291-10).
9.
Charge AC system (WP 0222 00).
10.
Verify correct operation of AC system (TM 5-3805-291-10).
11.
Install side cover (WP 0135 00).
12.
Close hood (TM 5-3805-291-10).
END OF WORK PACKAGE
0225 00-3/(0225 00-4 Blank)

