TM 5-2420-231-23-2
0092
DISASSEMBLY CONTINUED
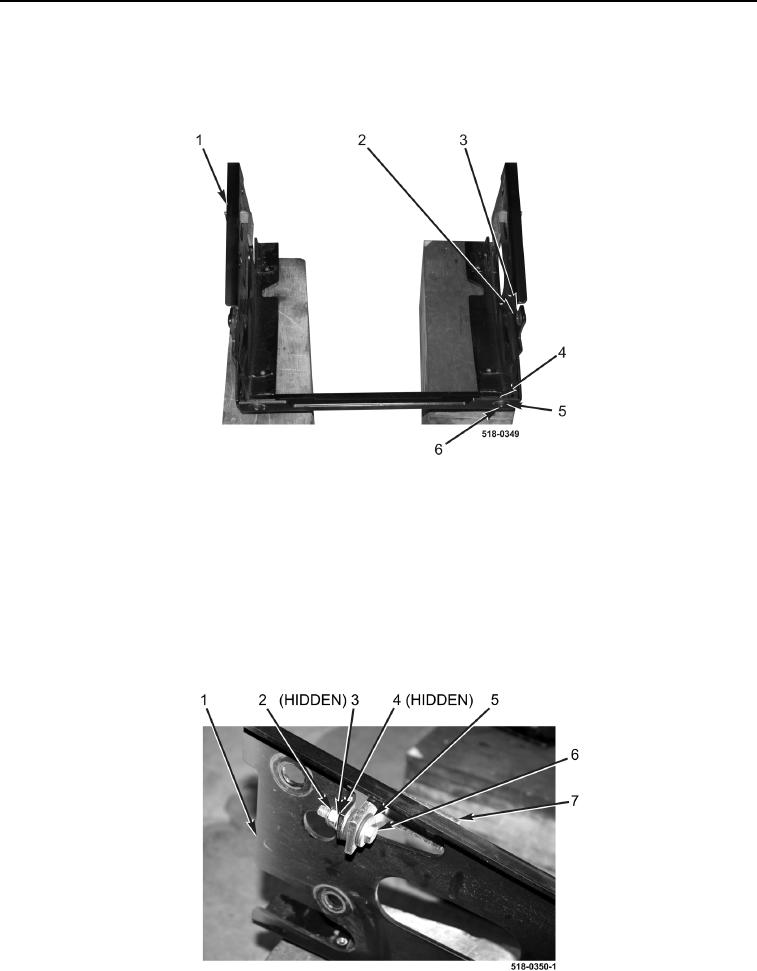
19. Remove two bolts (Figure 19, Item 6), spacers (Figure 19, Item 5), and locknuts (Figure 19, Item 4) from radia-
tor wrapper (Figure 19, Item 1). Discard locknuts.
20. Remove two spacer sleeves (Figure 19, Item 2) and grommets (Figure 19, Item 3) from radiator wrapper
(Figure 19, Item 1).
Figure 19. Radiator Wrapper.
0092
NOTE
The procedure for radiator mounting plate removal and replacement is identical for left-
hand and right-hand radiator mounting plate. Right-hand radiator mounting plate is shown
in this procedure.
21. Remove bolt (Figure 20, Item 6), washer (Figure 20, Item 5), radiator mount (Figure 20, Item 7), large washer
(Figure 20, Item 4), small washer (Figure 20, Item 3), and locknut (Figure 20, Item 2) from radiator wrapper
(Figure 20, Item 1). Discard locknut.
22. Repeat step 21 for left side.
Figure 20. Radiator Mount.
0092

