3. Position jacks and pads under the tie-down eyes in the
bucket hitch area of the front frame and snug the jacks.
4.
Remove upper and lower hitch pins from their bores.
Remove articulation cylinder pins from the bores.
5.
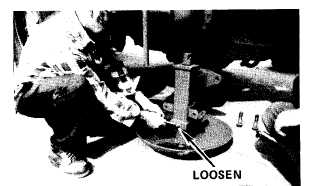
Carefully maneuver the rear section to within several
inches of the front section, watching that no hoses or
cables are pinched. Loosen the lock nut and setscrew
in the skid supports. Clean and grease the pivot bores.
WARNING
Stay clear of the track of the rear wheels when
making adjustments on the screw jacks and/or
aligning the hitch pivot surface.
WARNING
Keep personnel making adjustments and align-
ments in full view at all times.
TM 5-3805-258-10
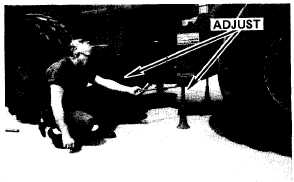
6. While inching the rear section forward (and left or
right as needed), adjust the jack screws on both sides
under the front frame and the jack screws in the skid
supports on both sides until the hitch pivot bearing
surfaces are all parallel and in line. Continue inching
while jacking until the pivot bearing surfaces engage.
Visually align the top bore through the cockpit cut-
out. Adjust jacks and skid supports and continue
inching until both the upper and lower bores are in
line.
NOTE
In some cases, it may be necessary to remove the
jacks from under the tie-down eyes under the rear
of the front frame (behind the front wheels), and
re-install them under the tie-down eyes forward
of the front wheels in the bucket hitch area.
CAUTION
Do not hammer the top pin in, but it may be tap-
ped in using the weight on the pin puller. If
tapping is not effective, remove top pin and repeat
step 6 until it can be tapped in.
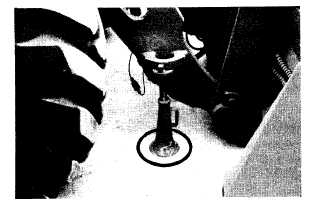
7. Stop engine and install top pin.
8. Adjust jacks and skid support so lower pin bores are
in line and pin can be tapped about almost all the way
in.
CAUTION
One man must hold hoses aside when installing
pin.
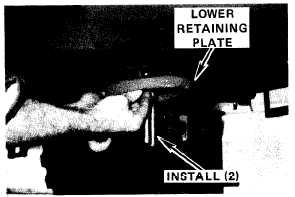
9.
Install two aligning pins into the tapped holes in the
lower pin. Slip the lower retaining plate up on the
aligning pins and attach the retaining plate securely
with three bolts. Remove aligning pins and using two
bolts, pull the pin all the way in. Remove the two bolts
and lower retaining plate.
CAUTION
Be sure shims are not on retaining plate when
using plate to pull up the spacer.
93