TM 5-3805-256-24-2
ENGINE
DISASSEMBLY AND ASSEMBLY
TIMING GEAR COVER
REMOVE TIMING GEAR COVER
1166-11
start by:
a) remove air compressor
b) remove alternator
c) remove air conditioning compressor
d) remove water pump
e) remove fan drive
f) remove engine front support
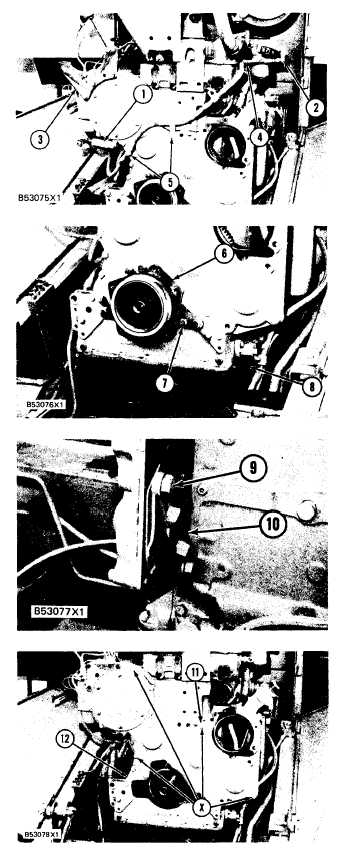
1. Remove the bolts and disconnect clips (4) and
(5) from the engine.
2. Disconnect fuel line (2) from the fuel priming
pump and move it away from the front cover.
3. Remove the bolt and disconnect ground wire
from alternator bracket (3).
4. Remove the bolts and alternator bracket (3)
from the front cover.
5. Remove the bolt and adjusting bracket (1)
from the front cover.
6. Install spacers (8) to each side of engine between
oil pan plate and the engine block as shown.
CAUTION
Use care when the trunnion is removed and
installed to prevent damage to the crankshaft
front seal.
7. Remove bolts (7), trunnion (6) and the O-ring
seal from the front cover.
8. Remove bolts (9), cover (10) and the gasket
from the timing gear plate.
NOTE: Put marks on all the bolts and their location
on timing gear cover (11) before removal. For infor-
mation about bolts at locations (X), see Page 5-72.
9. Remove bolts (11) and timing gear cover (12)
from the engine.
10. Clean the old gasket from the contact surfaces
of the timing gear cover and timing gear plate.
5-71


