
TM 5-3805-290-23-2
RIDE CONTROL HOSES, LINES, AND FITTINGS REPLACEMENT - CONTINUED
0133 00
INSTALLATION
N OT E
Apply a thin coat of clean oil to all O-rings before installation.
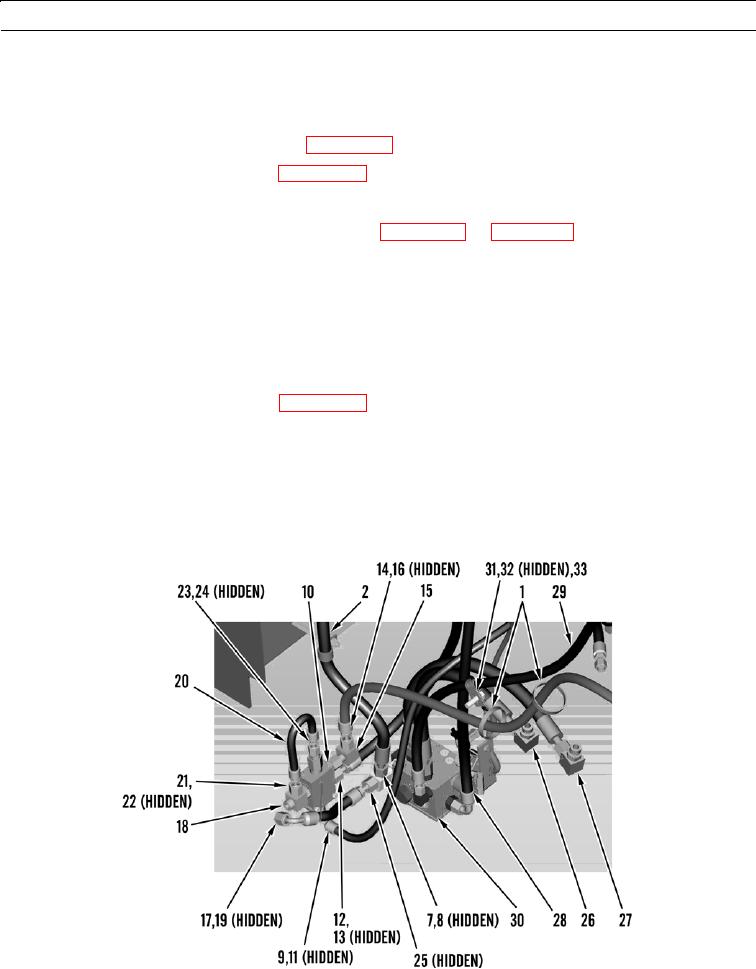
1.
Install five fittings on ride control valve (30) (WP 0123 00).
2.
Connect hose (29) to main control valve (WP 0134 00).
3.
Position clip (33) on machine and install washer (32) and bolt (31) on clip.
4.
Connect four hoses (26 thru 29) to ride control valve (30) (WP 0123 00 and WP 0131 00).
5.
Install new O-ring (25) and connect hose (17) to fitting (7).
6.
Install five fittings and new O-rings on shuttle valve (10).
7.
Install new O-ring (19) and connect hose (20) to shuttle valve (10).
8.
Install new O-ring (22) and connect hose (20) to fitting (21).
9.
Install new O-ring (19) and connect hose (17) to fitting (18).
10.
Connect hose (14) to main control valve (WP 0134 00).
11.
Install new O-ring (16) and connect hose (14) to fitting (15).
12.
Install new O-ring (13) and connect hose (12) to shuttle valve (10).
13.
Install two new O-rings (11) and connect hose (9) to shuttle valve (10) and machine.
14.
Install new O-ring (8) and connect hose (2) to fitting (7).
427-B1143
0133 00-4