TM 5-3805-292-23
0089
ASSEMBLY CONTINUED
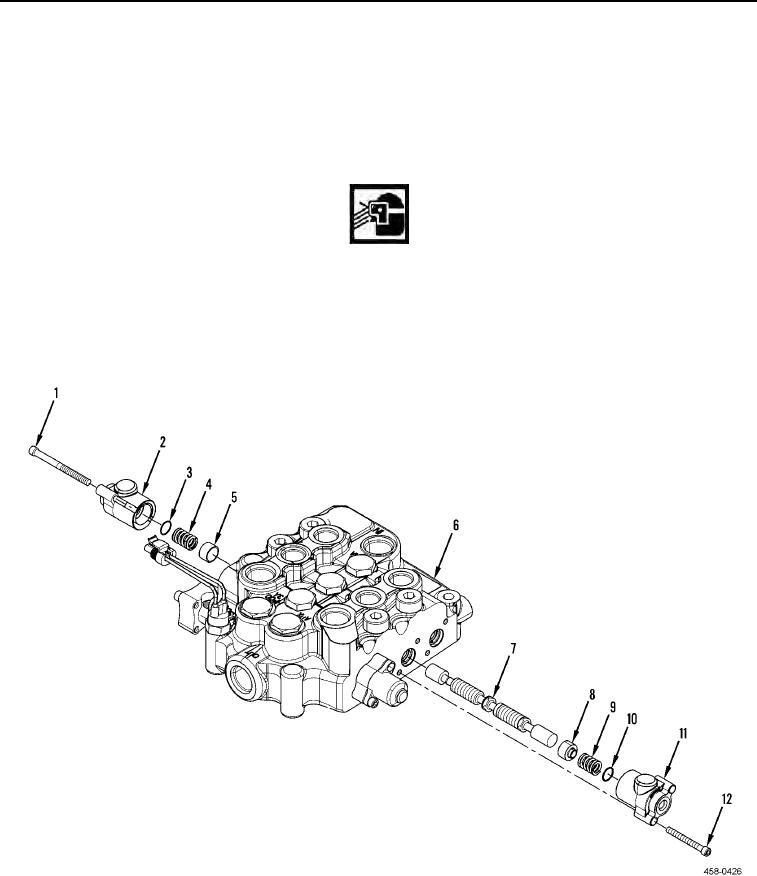
11. Lubricate bucket spool (Figure 9, Item 7) with clean hydraulic oil and install on main hydraulic valve (Figure 9,
Item 6).
12. Lubricate plunger (Figure 9, Item 8) with clean hydraulic oil and install plunger, spring (Figure 9, Item 9), new
O-ring (Figure 9, Item 10), cap (Figure 9, Item 11), and two bolts (Figure 9, Item 12) on main hydraulic valve
(Figure 9, Item 6).
WARN I N G
Springs may have significant tension. Use extreme caution when installing springs.
Springs under tension can act as projectiles when released. Failure to follow this warning
may result in injury to personnel.
13. Lubricate plunger (Figure 9, Item 5) with clean hydraulic oil and install plunger, spring (Figure 9, Item 4), new
O-ring (Figure 9, Item 3), cap (Figure 9, Item 2), and two bolts (Figure 9, Item 1) on main hydraulic valve (Fig-
ure 9, Item 6).
Figure 9. Bucket Spool.
0089
14. Lubricate new seal (Figure 10, Item 19) with clean hydraulic oil and install on spool (Figure 10, Item 18).
15. Lubricate loader spool (Figure 10, Item 18) with clean hydraulic oil and install on main hydraulic valve (Figure 10,
Item 8).

