
TM 5-2420-231-23-2
0192
REMOVAL
0192
NOTE
The procedure for taillight assembly removal and replacement is identical for left-hand and
right-hand taillight assemblies. Left-hand taillight assembly is shown in this procedure.
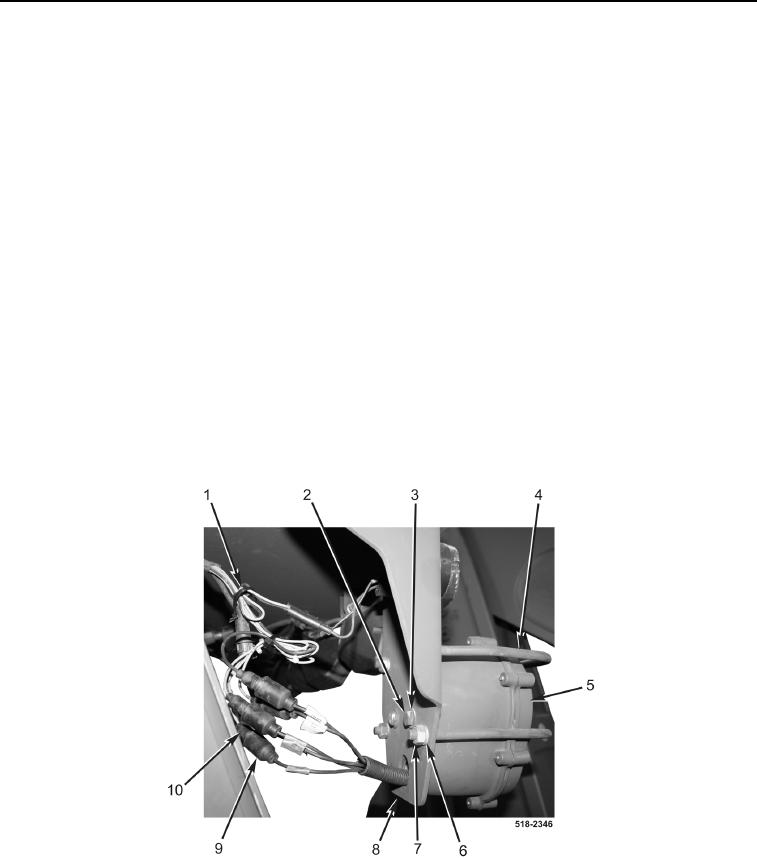
1. Remove four nuts (Figure 1, Item 7), lockwashers (Figure 1, Item 6), and two brush guards (Figure 1, Item 4)
from mounting bracket (Figure 1, Item 8). Discard lockwashers.
NOTE
Note location and quantity of tiedown straps to aid in installation.
2. Remove tiedown straps (Figure 1, Item 1) from taillight assembly wiring harness (Figure 1, Item 9). Discard
tiedown straps.
NOTE
Tag and mark wires to aid in installation.
3. Disconnect five taillight assembly wiring harness connectors (Figure 1, Item 9) from wiring harness connectors
(Figure 1, Item 10).
4. Remove two bolts (Figure 1, Item 2), washers (Figure 1, Item 3), and taillight assembly (Figure 1, Item 5) from
mounting bracket (Figure 1, Item 8).
Figure 1. Taillight Assembly.
0192
END OF TASK