TM 5-3805-255-14
0091
CLEANING, INSPECTION, AND REPAIR
00091
1. Clean and inspect flywheel and ring gear IAW General Maintenance Instructions (WP 0019).
NOTE
When heat check score marks or grooving is considered excessive, flywheel must be re-
faced. Maximum allowable stock that can be removed during life of flywheel is 0.060 in.
(1.52 mm).
Removal of more surface material than specified above may weaken flywheel or result in
interference of driven disc hub with clutch pilot bearing on crankshaft bolt heads.
2. Inspect clutch driven disc friction face on flywheel for heat checks and scoring. If it is not in serviceable
condition, replace flywheel.
3. Inspect starter gear for broken or milled teeth, and replace if necessary.
4. Inspect ring gear for broken or milled teeth and replace if necessary.
5. Inspect pilot bearing for wear or damage, replace if necessary.
NOTE
Before installing flywheel, flywheel housing should be checked as follows.
Checking Flywheel Housing Face Run-Out
00091
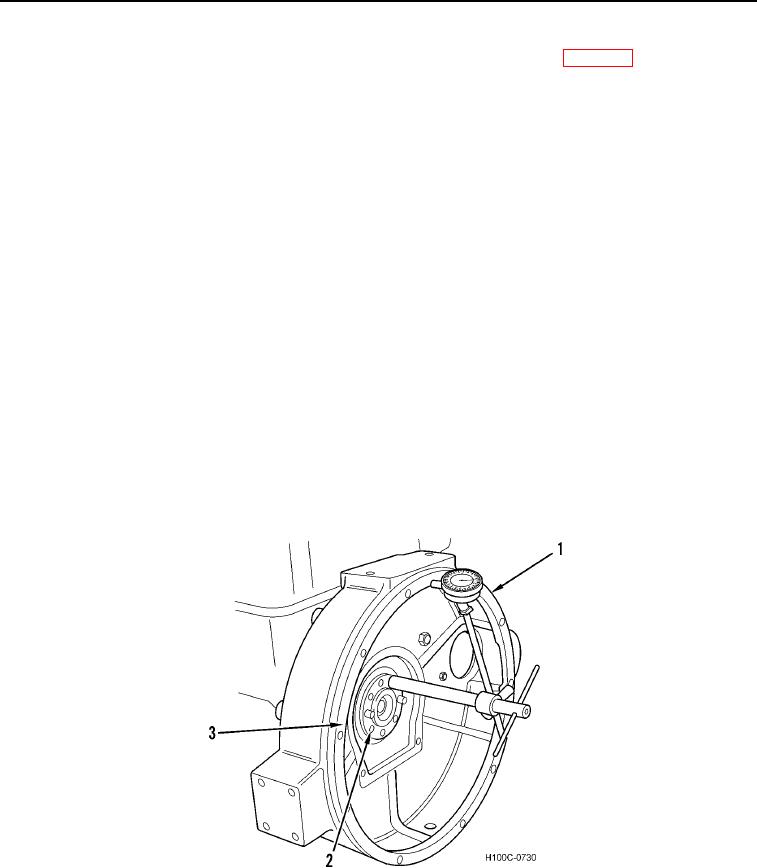
To check run-out of flywheel housing (Figure 2, Item 1), attach a dial indicator to crankshaft flange (Figure 2, Item
2) placing indicator pointer against flywheel housing flange (Figure 2, Item 3). Remove crankshaft end-play and
note reading. Check at four points 90 degrees apart for total face variation. Keep crankshaft end-play at zero in
same direction for all readings. Allowable housing face run-out tolerance is 0.008 in. (0.20 mm).
Figure 2. Checking Run-Out of Flywheel Housing Face.
0091
0091-3

