TM 5-3805-262-20
5-10. WIRING HARNESS MAINTENANCE (CONT)
b. Rear Wiring Harness.
This task covers testing and repair of rear wiring
h a r n e s s.
TOOLS: No. 1 Common Organizational Maintenance Tool Kit
Combination box and open end wrench set
Socket wrench set, 3/8 inch drive
E l e c t r i c a l r e p a i r t o o l k i t
Multimeter
Soldering gun, 25 watts
MATERIALS/PARTS: Clean cloths (Appendix C, item 1)
Insulation tape (Appendix C, item 5)
Solder (Appendix C, item 16)
Electrical cleaner (Appendix C, item 19)
Electrical sealer (Appendix C, item 20)
NOTE
PRELIMINARY PROCEDURE: Battery ground cable disconnected (page 5-148)
and engine side panels removed (page 9-14).
TESTING (SHEET 1 OF 2)
NOTE
T e s t i n g c o n s i s t s o f s t a r t i n g t h e e n g i n e a n d c h e c k i n g a l l r e a r w i r i n g
harness circuits as shown in figure FO-3.
The wiring harness is okay if
a l l c i r c u i t s f u n c t i o n n o r m a l l y.
I f n e c e s s a r y , y o u m a y t e s t i n d i v i d u al
w i r e s f o r c o n t i n u i t y b y e n e r g i z i n g t h e c o r r e s p o n d i n g c i r c u i t s h o w n i n
figure FO-3 and checking for voltage using multimeter or test light. To
test for shorted or grounded wire,
you must disconnect both ends of wire
under test as follows.
(1)
Tag rear wiring harness connectors and disconnect as follows:
( a )
(b)
( c)
(d)
Disconnect friction-type spade and
bullet terminals by grasping terminals
with fingers and pulling firmly .
Disconnect lug terminals by loosening
and removing attaching nuts or screws.
Remove resistor by grasping fuseholder
halves with fingers,.pushing together,
twisting counterclockwise, and pulling
a p a r t.
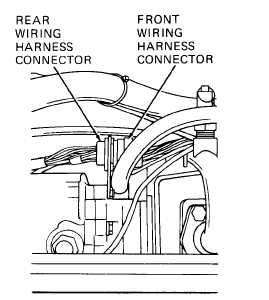
Unplug front wiring harness connector
from rear wiring harness connector by
pushing connector nut, turning counter-
clockwise, and pulling firmly.
5-172


