
TM 5-3805-290-23-2
CHANGING ENGINE OIL AND OIL FILTER REPLACEMENT - CONTINUED
0025 00
REMOVAL - CONTINUED
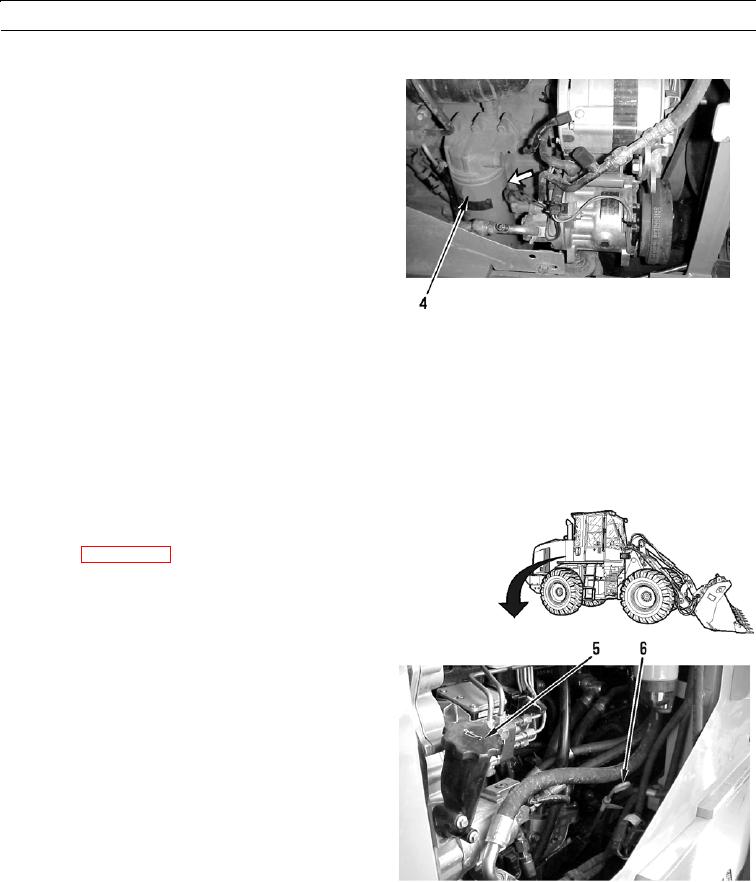
5.
Remove oil filter element (4) from engine. Discard oil
filter element.
427-B0047
CLEANING AND INSPECTION
1.
Clean filter mounting base surface with a clean cloth. Make sure that old filter gasket has been removed.
2.
Inspect oil filler cap and O-ring for damage. Replace if damaged.
INSTALLATION
1.
Apply thin coat of clean engine oil to sealing surface of filter element (4).
2.
Install new filter element (4) by hand. When gasket contacts filter mounting base, tighten filter an additional 3/4 turn.
3.
Remove oil filler cap (5).
4.
Fill crankcase with 4.2 gal. (16 L) of new oil. Refer to
PMCS (WP 0020 00) for correct viscosity/grade for
climate.
5.
Install oil filler cap (5).
6.
Start engine (TM 5-3805-290-10) and verify oil pres-
sure builds.
7.
Run engine until normal operating temperature is
reached (TM 5-3805-290-10).
8.
Shut down engine (TM 5-3805-290-10) and allow oil
to drain back into oil pan. Maintain oil level in cross-
hatched region of engine oil dipstick (6). Add oil if
necessary.
9.
Check for engine oil leaks.
427-B0048
END OF WORK PACKAGE
0025 00-3/(0025 00-4 Blank)