
TM 5-3805-290-23-2
FRONT AXLE REPLACEMENT - CONTINUED
0179 00
FRONT AXLE INSTALLATION - CONTINUED
N OT E
Utilize two line wrenches to avoid damage to hoses and fittings.
Apply a thin coat of clean oil to all O-rings before installation.
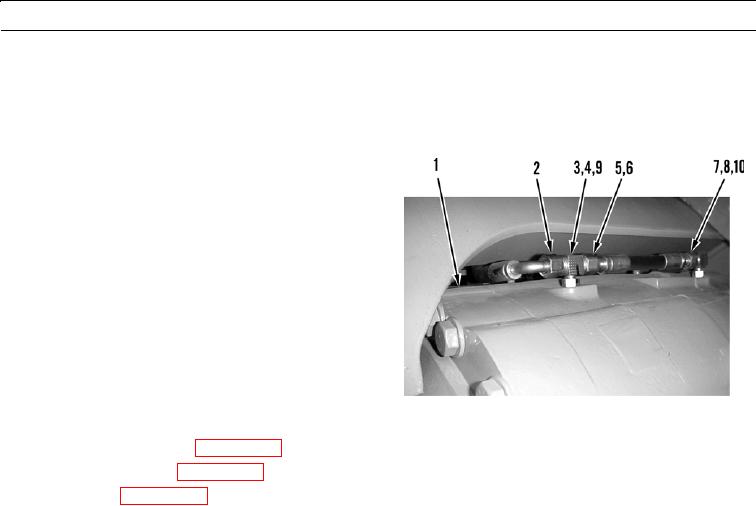
5.
At top of front axle (1), install new O-ring (10) and
install elbow (7) on front axle.
6.
Install new O-ring (9) and T (3) on front axle (1).
7.
Install new O-ring (8) and brake hose (5) on elbow (7).
8.
Install new O-ring (6) and connect brake hose (5) to T
(3).
9.
Install new O-ring (4) and connect brake hose (2) to T
(3).
427-B0113
10.
Install front tires and rims (WP 0097 00).
11.
Install front drive shaft (WP 0090 00).
12.
Fill front axle (WP 0091 00).
13.
Run engine until normal operating temperature is reached (TM 5-3805-290-10).
14.
Shut down engine (TM 5-3805-290-10).
15.
Check for leaks around front axle.
END OF WORK PACKAGE
0179 00-4