
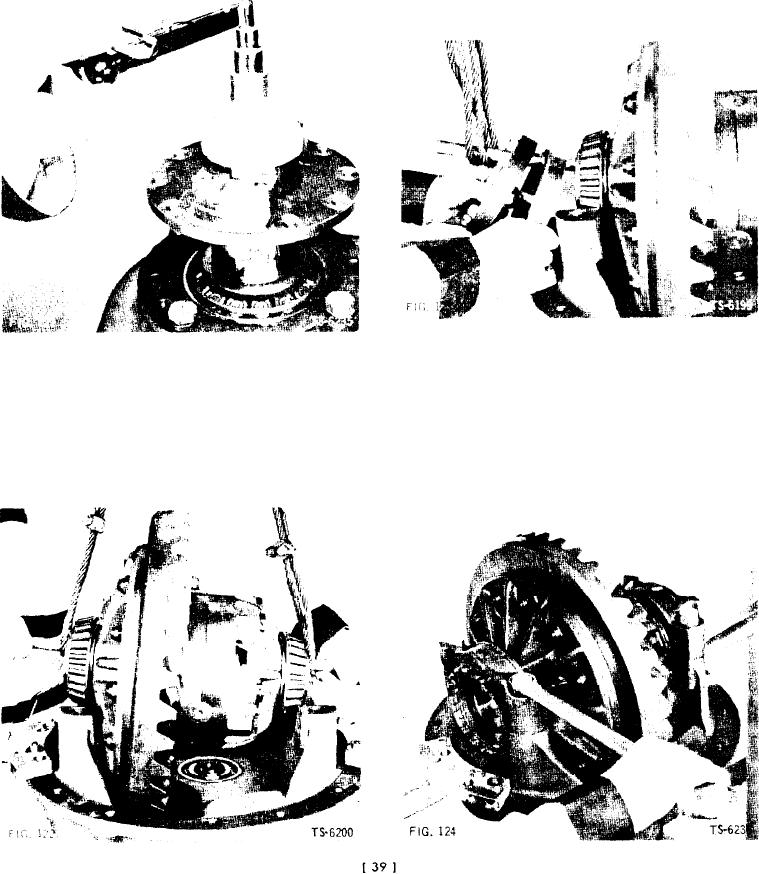
5. Position differential bearing cup and differential ad-
3. Use "inch-pound" torque wrench to check bearing pre-
justing nut on lifting bar on one side of differential and
load (Fig. 121). If bearing preload is not between 13
and 23 in. tbs., disassemble parts and add shims to
lift bar slightly with hoist. Position bearing cup and ad-
decrease preload or remove shims to increase preload.
justing nut on carrier (Fig. 123). Repeat procedure to
install opposite bearing cup and adjusting nut. Take
care to prevent cross-threading of nuts.
NOTE: If differential bearing cones are replaced, new
bearing cups must be used.
6. Position bearing caps on bearings and nuts, making
4. Position differential carrier and pinion assembly in dif-
sure match-marks made during disassembly are prop-
ferential stand so that pinion shaft is down. insert bar
erly aligned. Install bearing cap bolts (Fig. 124) and
through differential to facilitate hoisting. Position dif-
tighten until snug, but do not torque. Rotate adjusting
ferential into carrier, tilting it so that ring gear will
nuts from time to time to assure that they are not cross-
clear inner bearing boss in carrier (Fig. 122).
threaded.
NOTE: If differential bearing cones are replaced it is
also necessary to replace differential bearing cups.