ENGINE
PISTON AND ROD
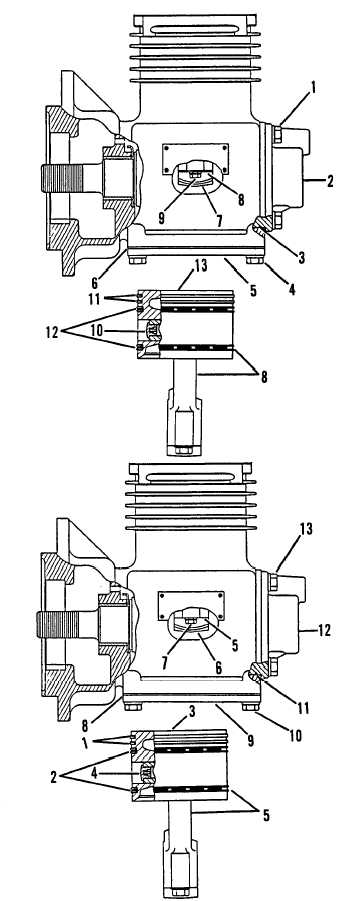
PISTON AND ROD REMOVAL
1.
2.
3.
4.
5.
6.
7.
8.
start by:
a) remove head assembly
Remove four bolts and lockwashers (1).
Remove cover (2) and seal (3).
Remove four bolts and lockwashers (4).
Remove cover (5) and gasket (6).
Put matching identification marks on the
rod cap (7) and piston rod (8) to ensure
correct assembly.
Remove bolts (9) and rod cap (7), then
remove piston and rod (8) from the crank-
case.
Put matching identification marks on the
piston and the rod to ensure correct assem-
bly.
Remove retaining ring from wrist pin (10)
and push pin from piston and rod.
Clean all parts.
Remove piston rings (11) and oil rings (12).
Clean ring grooves in piston (13) with a piece
of hard wood.
INSTALL PISTON AND ROD
1.
2.
3.
Inspect piston for scoring, cracks, or en-
larged ring grooves. Replace piston if any of
these conditions exist.
Check wrist pin installation. If pin can be
inserted through the piston and rod with
only slight pressure, fit is acceptable, If pin
is a loose fit, the piston and rod assembly
must be replaced.
Install piston rings (1) and oil rings (2). The
gap for each ring must not be near the piston
pin bore, and each gap must be approxi-
mately 1200 from the gap in the next ring.
TM 5-3805-258-24-2
DISASSEMBLY AND ASSEMBLY
5-18d