TM 5-3805-258-24-2
ENGINE
DISASSEMBLY AND ASSEMBLY
HEAD ASSEMBLY
REMOVE HEAD ASSEMBLY
start by:
a) remove air compressor
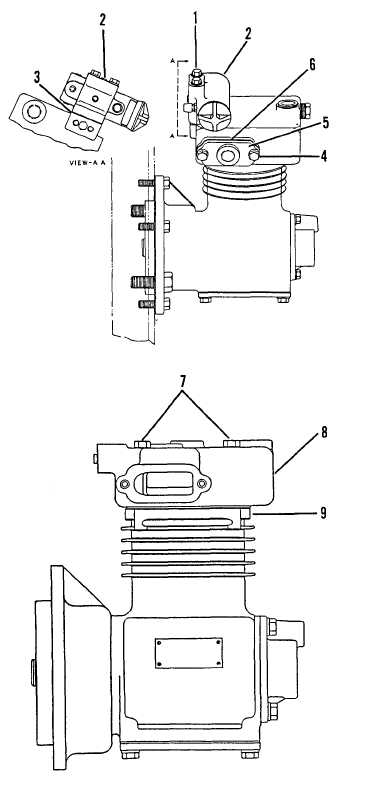
1. Remove two bolts and washers (1).
2. Remove governor (2) and gasket (3).
3. Remove two bolts and washers (4); adapter
(5), and gasket (6).
4. Remove four bolts (7) and remove head
assembly (8).
NOTE: It may be necessary to tap the head as-
sembly with a soft hammer to break the gasket
seal.
5. Remove and discard gasket (9).
INSTALL HEAD ASSEMBLY
NOTE: Make sure all of the old gasket material is
removed from the mating surfaces of the head
and crankcase.
NOTE: Gaskets (3, 6, and 9) are also available
with Repair Kit 7C0569 (Refer to Head Assembly,
Disassemble and Assemble).
1.
2.
3.
4.
5.
Install new gasket (9).
Install head assembly (8) and tighten four
bolts (7) in a cross-pattern to 175-225
lb. in. (202-260 kg.cm).
Install new gasket (6), adapter (5), and bolts
and washers (4).
Install new gasket (3).
Install governor (2) with bolts and washers
(l).
end by:
a) install air compressor
5-18a


