ENGINE
TM 5-3805-258-24-2
4.
5.
6.
7.
8.
9.
10.
11.
PISTON
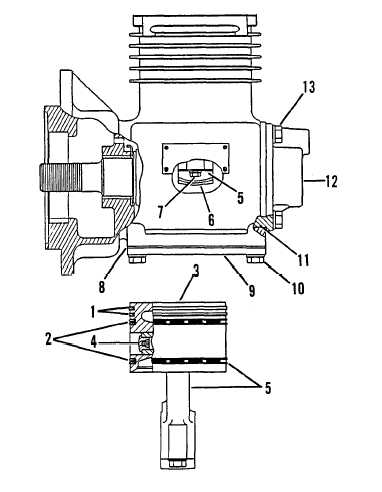
Measure clearance between grooves and
piston rings (1), and between grooves and oil
rings (2). Clearance must be 0.004 to 0.012
in. (0.10 to 0.30 mm).
Assemble piston (3) to rod. Be sure identifi-
cation matching marks made during disas-
sembly are aligned.
Install wrist pin (4) and secure in place with
retaining ring.
Install rod and piston (5) in crankcase.
Measure piston and oil ring gaps with piston
and rod (5) installed in cylinder bore.
Piston Ring Gap Clearance: 0.002 to 0.004
in. (0.05 to 0.010 mm).
Oil Ring Gap Clearance: 0.0015 to 0.0035
in. (0.04 to 0.09 mm).
Align matching marks of rod cap (6) and
piston rod (5). Install rod cap (6) and bolts
(7).
Install new gasket (8). Install cover (9), and
bolts and lockwashers (10).
Install new seal (11), cover (12), and bolts
and lockwashers (13).
end by:
a) install head assembly
DISASSEMBLY AND ASSEMBLY
AND ROD
5-18e

