TM 5-3805-262-34
INSTALLATION
(1)
(2)
(3)
(4)
(5)
(6)
(7)
LEGEND
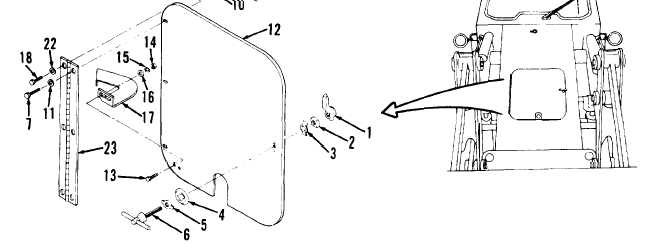
1. Latch
2. Nut
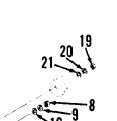
Position hinge (23) on front chassis and secure using three washers (22),
capscrews (18), washers (21), lock washers (20), and nuts (19). Put
clamps,
located on axle breather hose, on top and bottom capscrews (18)
before installing nuts (19). Tighten nuts (19) securely.
Position stop (17) on access door (12) and secure using two capscrews
(13), washers (16), lock washers (15), and nuts (14). Tighten nuts (14)
securely.
With an assistant helping, put access door (12) in position on front
chassis.
While assistant supports access door (12) put three washers (11) on cap-
screw (7). Aline holes in hinge (23) with associated holes in access door
(12) and install capscrews and washers.
Install and tighten three washers (10), lock washers (9), and nuts (8).
Tighten nuts (8) securely.
If removed, put lock ring (5) and ring (4) on handle (6). Put handle
through hole in access door (12). Check that tabs on lock ring are alined
with associated slots in ring. Install tab washer (3), nut (2) and latch
(1).
Close access door (12) and rotate handle (6) clockwise to secure.
13. Capscrews (2)
14. Nuts (2)
3. Tab washer
4. Ring
5. Lock ring
6. Handle
7. Capscrews (3)
8. Nuts (3)
9. Lock washers (3)
10. Washers (3)
11. Washers (3)
12. Access door
15. Lock washers (2)
16. Washers (2)
17. stop
18. Capscrews (3)
19. Nuts (3)
20. Lock washers (3)
21. Washers (3)
22. Washers (3)
23. Hinge
3-577