TM 5-3805-255-14
0090
INSTALLATION CONTINUED
NOTE
When installing a new crankshaft, remove protective coating from exterior and all drilled oil
passages.
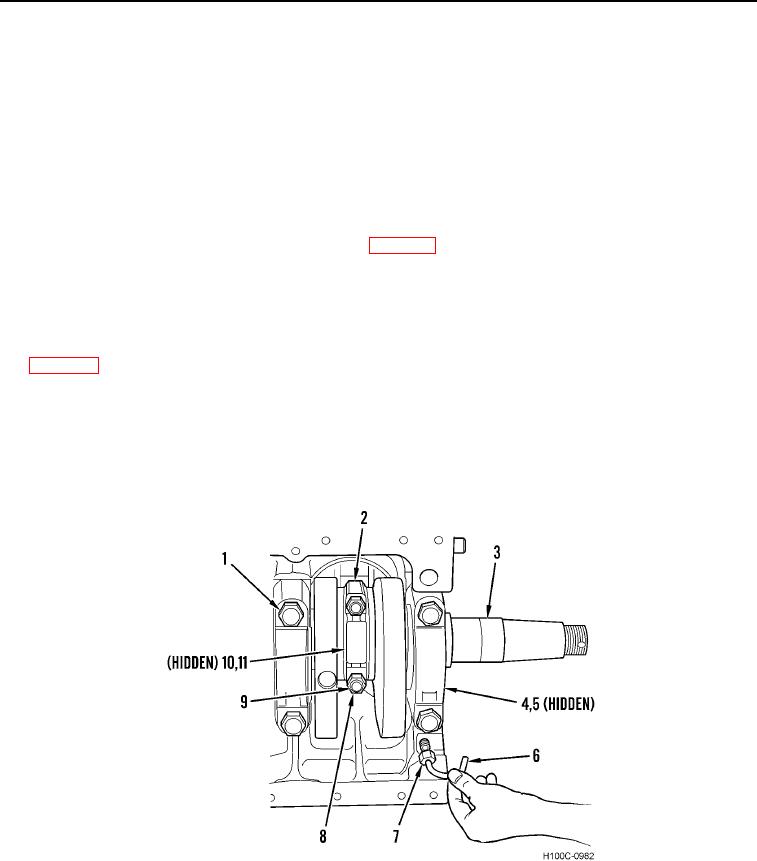
3. Install crankshaft (Figure 10, Item 3) in place.
NOTE
Number that is stamped on each main bearing cap (to identify its location) must be toward
camshaft side of crankcase when installed.
Coat all main bearings with clean engine oil (WP 0131) after installation.
4. Install lower main bearings (Figure 10, Item 5) and bearing caps (Figure 10, Item 4). Lubricate main bearing
cap bolts (Figure 10, Item 1) with clean engine oil and torque in steps, first to 175 lb-ft (238 Nm), then to
235 lb-ft (320 Nm).
5. Pull six connecting rods (Figure 10, Item 2) down on crankshaft (Figure 10, Item 3). Be sure that bearings
(Figure 10, Item 11) are in place. Coat threads of connecting rod bolts (Figure 10, Item 9) with clean engine oil
6. Install six connecting rod bearings (Figure 10, Item 11) and bearing caps (Figure 10, Item 10), being sure that
correct cap is located on its rod and that identifying numbers are on same side. Torque connecting rod bolt
nuts (Figure 10, Item 8) in steps, first to 112 lb-ft (152 Nm) then to 150 lb-ft (203 Nm).
7. Install gear oil jet tube (Figure 10, Item 6) on crankcase. Tighten gear oil jet tube nut (Figure 10, Item 7)
securely.
Figure 10. Main Bearing and Connecting Rod Cap Installation.
0090
0090-12

